GEOINFORMATION PRODUCTS


| ENVIRONMENTAL INFORMATICS GEOINFORMATION PRODUCTS |
BROCKMANN CONSULT | |
|
BEAM Java Tutorial | |
| INDEX| SET-UP| EX 1| EX 2| EX 3a| EX 3b| EX 4| OUTLOOK |
How to create a new data product and write it line by line
This exercise will produce exactly the same output as exercise 3a but this time we use a different and more important approach to write the pixel data. In exercise 3a, we had to create the entire pixel buffer in memory. For 512 times 512 pixels this is absolutely reasonable. But what if we had to process a full-orbit swath product, with 14500 scan lines and 15 output bands? This exercise shows how to first write a product skeleton, this is the header and associated meta-data and the to write the band data band-wise and line-wise, so that we can operate with a minimum memory consumption. All data processors build into BEAM use this approach to write pixel data.
We start by reusing the source code from exercise 3a up to the point
where we've added the band to the product. Then we assign new names product_ex3b,
EX3B and band_ex3b. We then obtain a ProductWriter
using the utility class ProductIO:
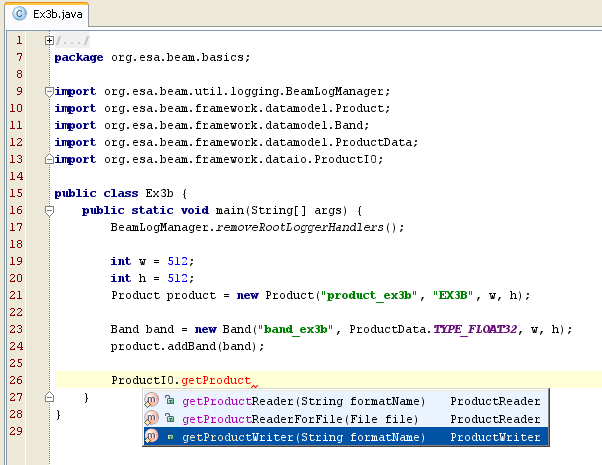
Again, we want a product writer for the BEAM-DIMAP format. Once we have it, we assign the writer to the product instance:

Instead of writing the entire product, we now just write the product "skeleton" using the
writer's writeProductNodes method. The method takes the product object and an output
object, we use a file path of type String again. Calling this method will write
everything a product is composed of at the time the method is called excluding the pixel data
of the bands:

Of course we again have to handle I/O errors possibly occuring during this call:

We now take a look into the band interface in order to write pixel data line-wise.
The writePixels method is such a candidate:
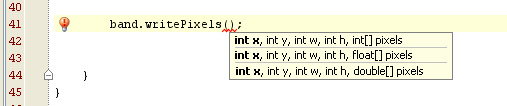
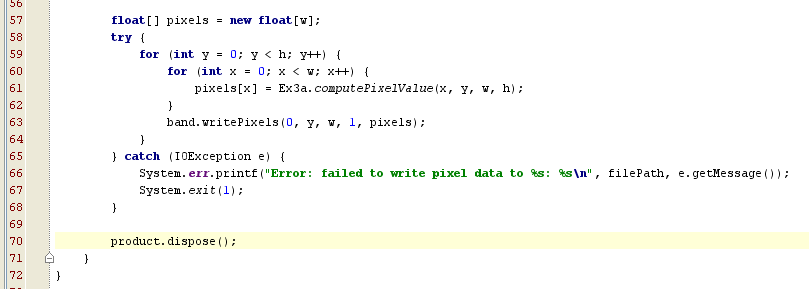
We want to write the same pixel data as in exercise 3a. But now we only need a pixel buffer for a single scan line. And after each scan line is computed it is written out:
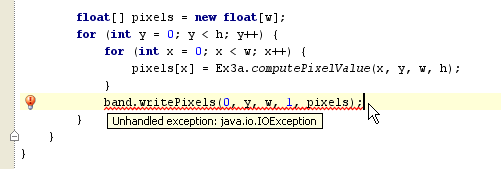
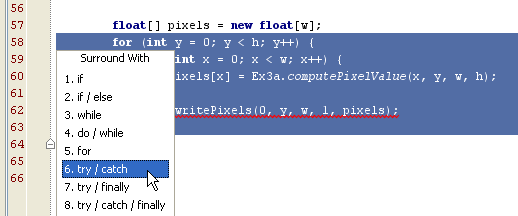
It does not make much sense to handle the IOException for a single line and
then to continue with the next one. That's why we now place the try/catch block around
the entire loop. Mark the entrire loop in the editor and press Ctrl+Alt+T
(Surround with...):
We add some error handler code and finally dispose the product as always:
Run the program (Shift+F10). If no errors occured, the program should have written the BEAM-DIMAP
product product_ex3b.dim to your IDE project directory. It should be identical to
product_ex3a.dim.
Exercise 3b is herewith complete so that we now can head over to exercise 4.
© 2005 by Brockmann Consult - Need help? Contact beam minus issues at brockmann minus consult dot de