| Using the BEAM Toolbox | |
The BEAM Toolbox provides various functions that can be easily used in your software (e.g. a data processing module). Once you have created a BEAM Library following the Eclipse configuration notes in this document you can integrate this user library into your software to use the BEAM JavaTM API.
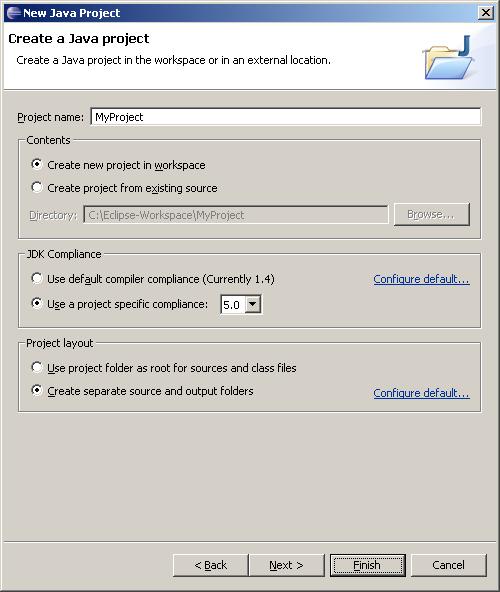
The Java Project Wizard will help you creating a new Eclipse Project. You can start the Java Project Wizard by clicking File > New > Project, selecting "Java Project" from the wizard list and pressing the Next button. It takes two steps to create the new project.
Step One:
- Enter a name for your new project into the "Project name" field.
- Set the "Create new project in workspace" radiobutton.
- Set the "Create separate source and output folders" radiobutton.
After clicking the Next button a new dialog window containing four tabs "Source", "Project", "Libraries" and "Order and Export" will appear.
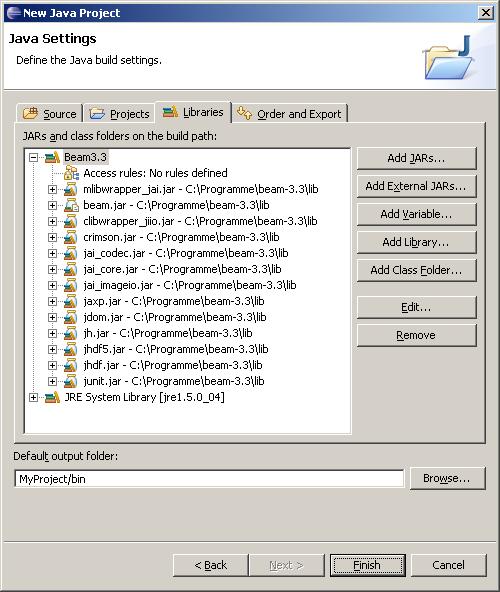
Step Two:
- Select the "Libraries" tab.
- Click the Add Library... button.
- Select "user library" from the list.
- Select the "user library" you have created in the chapter Configuring Eclipse.
- click the Finish button.
After pressing the Finish button Eclipse creates a new project folder in your workspace.
Within this folder you will find files and subdirectories storing your project configuration, a \src
directory for the source code of your plug-in and an output directory \bin, where
eclipse will store the compiled sources of your plug-in.
Now you are able to create JavaTM classes inside of your new project and use the BEAM API functions.
To create a new scientific processor you will at least need two classes. One base class that provides the processing algorithms and another class with a main method to start your processor. The BEAM JavaTM API provides an easy to use processing framework.
Perform the following instructions to create the base class for your processor.
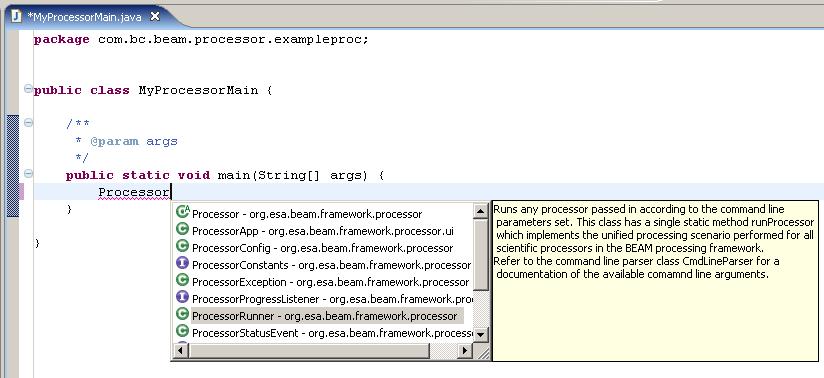
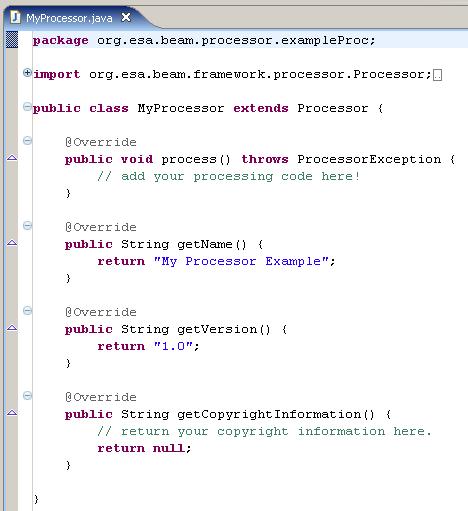
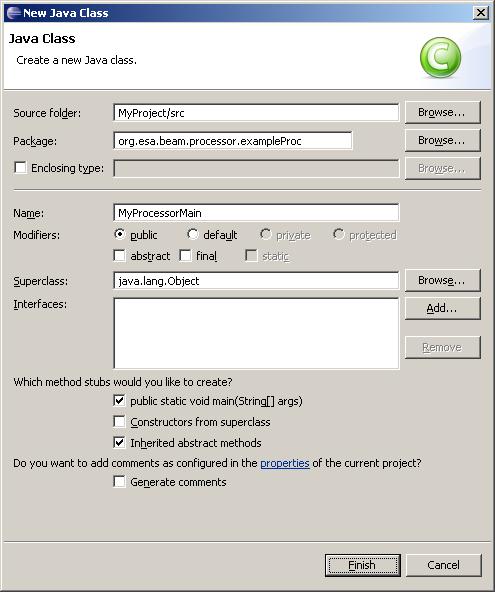
Note: For a well structured Java code you should create a suitable package structure to store your classes. In the following example all classes will be stored in the package org.esa.beam.processor.exampleProc. Use New > Package to create your package structure inside the /scr folder of your project or simple enter the prefered package name into to the package field of the new class wizard.
public static void main(String[] args) is disabled.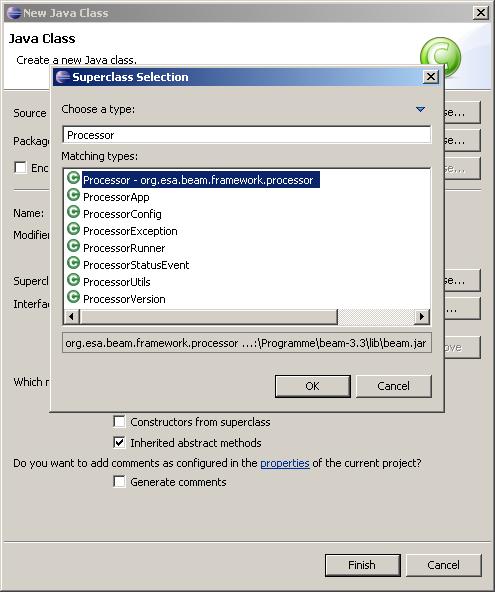
Eclipse will create now the new class MyProcessor extending class org.esa.beam.framework.processor.Processor and add empty method bodies for the methods you will have to implement.
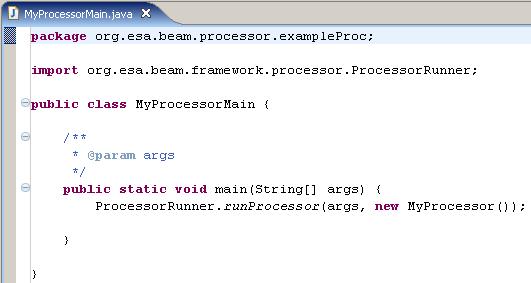
Furthermore you will have to create a new class with a main method, so you are able to start your processor.
Again the BEAM processing framework provides methods for this reason. Use the ProcessorRunner class for starting your processor.
Hint: The Eclipse Code Assist will assist you on typing source code. You can activate it by pressing
Ctrl +
Space
. E.g.: To enter the class nameProcessorRunneryou can simply enter the first letters of the class name (e.g. Processor) and pressCtrl + Space.
A list with all classes starting with
Processorwill appear. Select theProcessorRunnerclass from the list. Beside completing your input, Eclipse will automatically apply the necessary import statement.
The ProcessorRunner provides the method runProcessor() that will start
your Processor and pass the command line arguments to it.
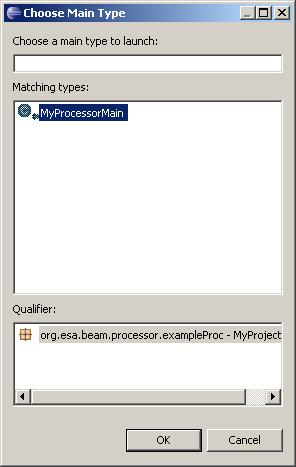
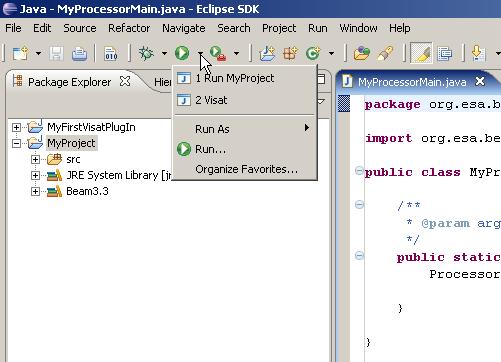
To run the new created processor you will have to create a run configuration.
Click the Apply button to save your new run configuration. After you have started your new created run configuration from this dialog window the first time by clicking the Run button, it can be launched again quickly via the "Run History".
Return to the MAIN PAGE